User Documentation · Chapter 3
Quick Start Guide
From a freshly downloaded installer to your first working agent in about five minutes.
This Quick Start Guide takes you from a freshly downloaded installer to your first working agent in about five minutes. It gives you the short path through the product; each stage refers to the chapter that explains it in full, so you can come back for the details whenever you need it.
Step 1: Install the application
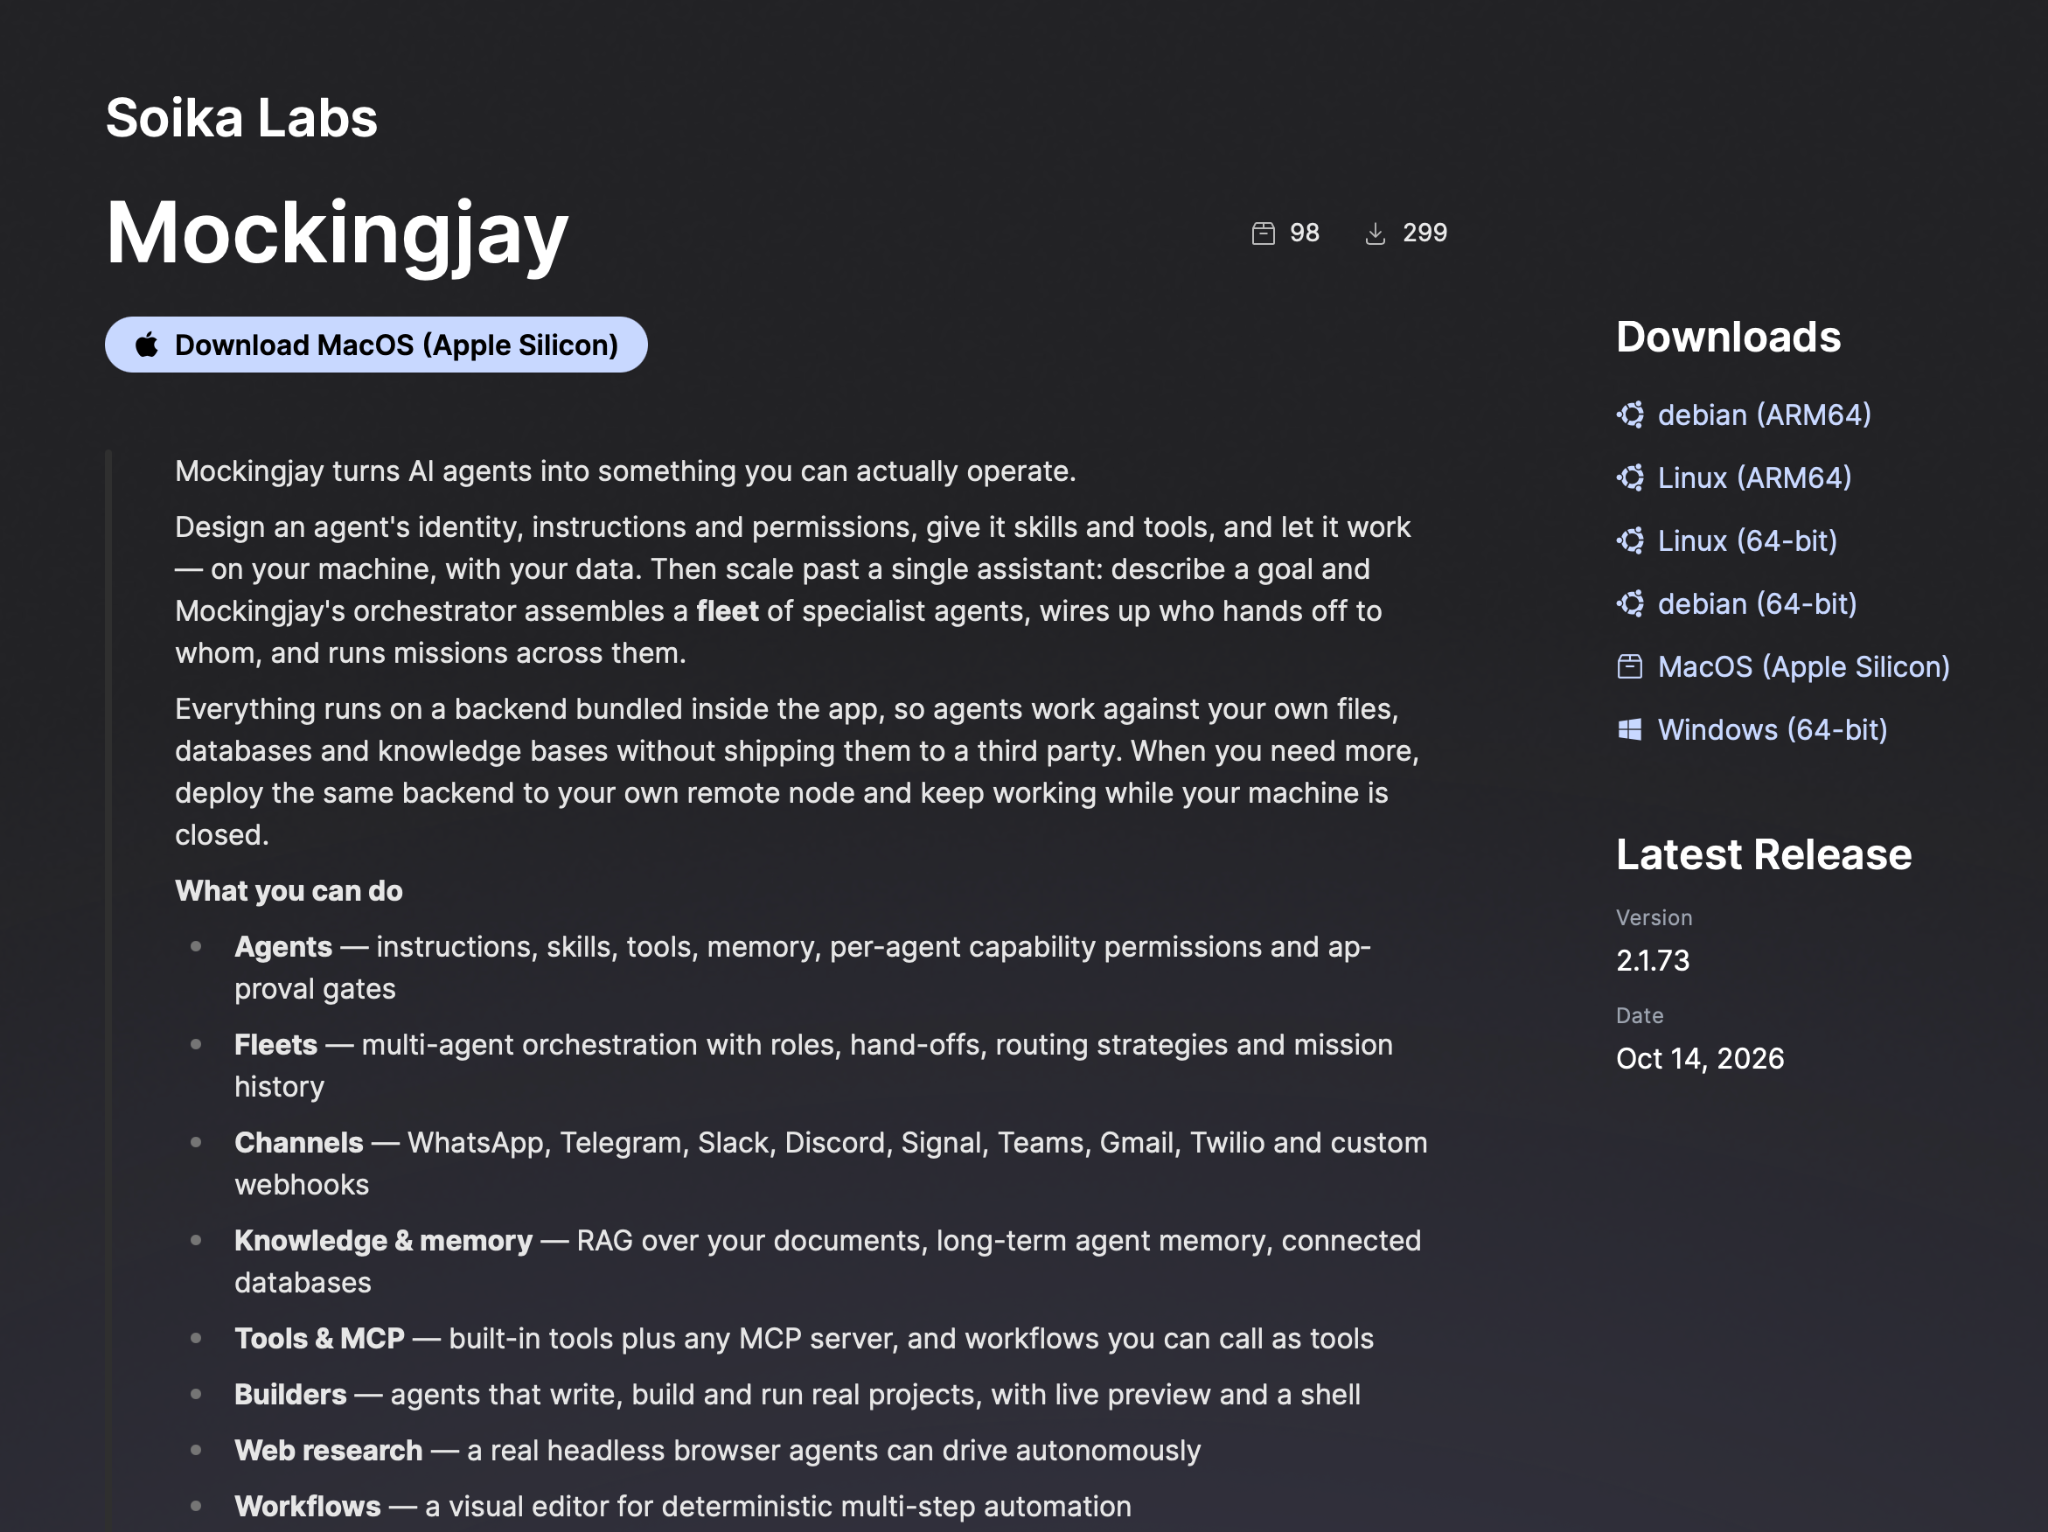
Start by confirming that your computer meets the requirements described in Mockingjay Installation – Prerequisites. Then install Mockingjay by following the instructions for your operating system on Windows and macOS, installation is a familiar double-click process. On Linux, you install from a package or run an AppImage with a short terminal command.
Step 2: Sign in and check that everything is working
When you open Mockingjay for the first time, you are asked to sign in with your Mockingjay account or to create a new one. After signing in, the application opens your Default project and shows the Welcome Screen.
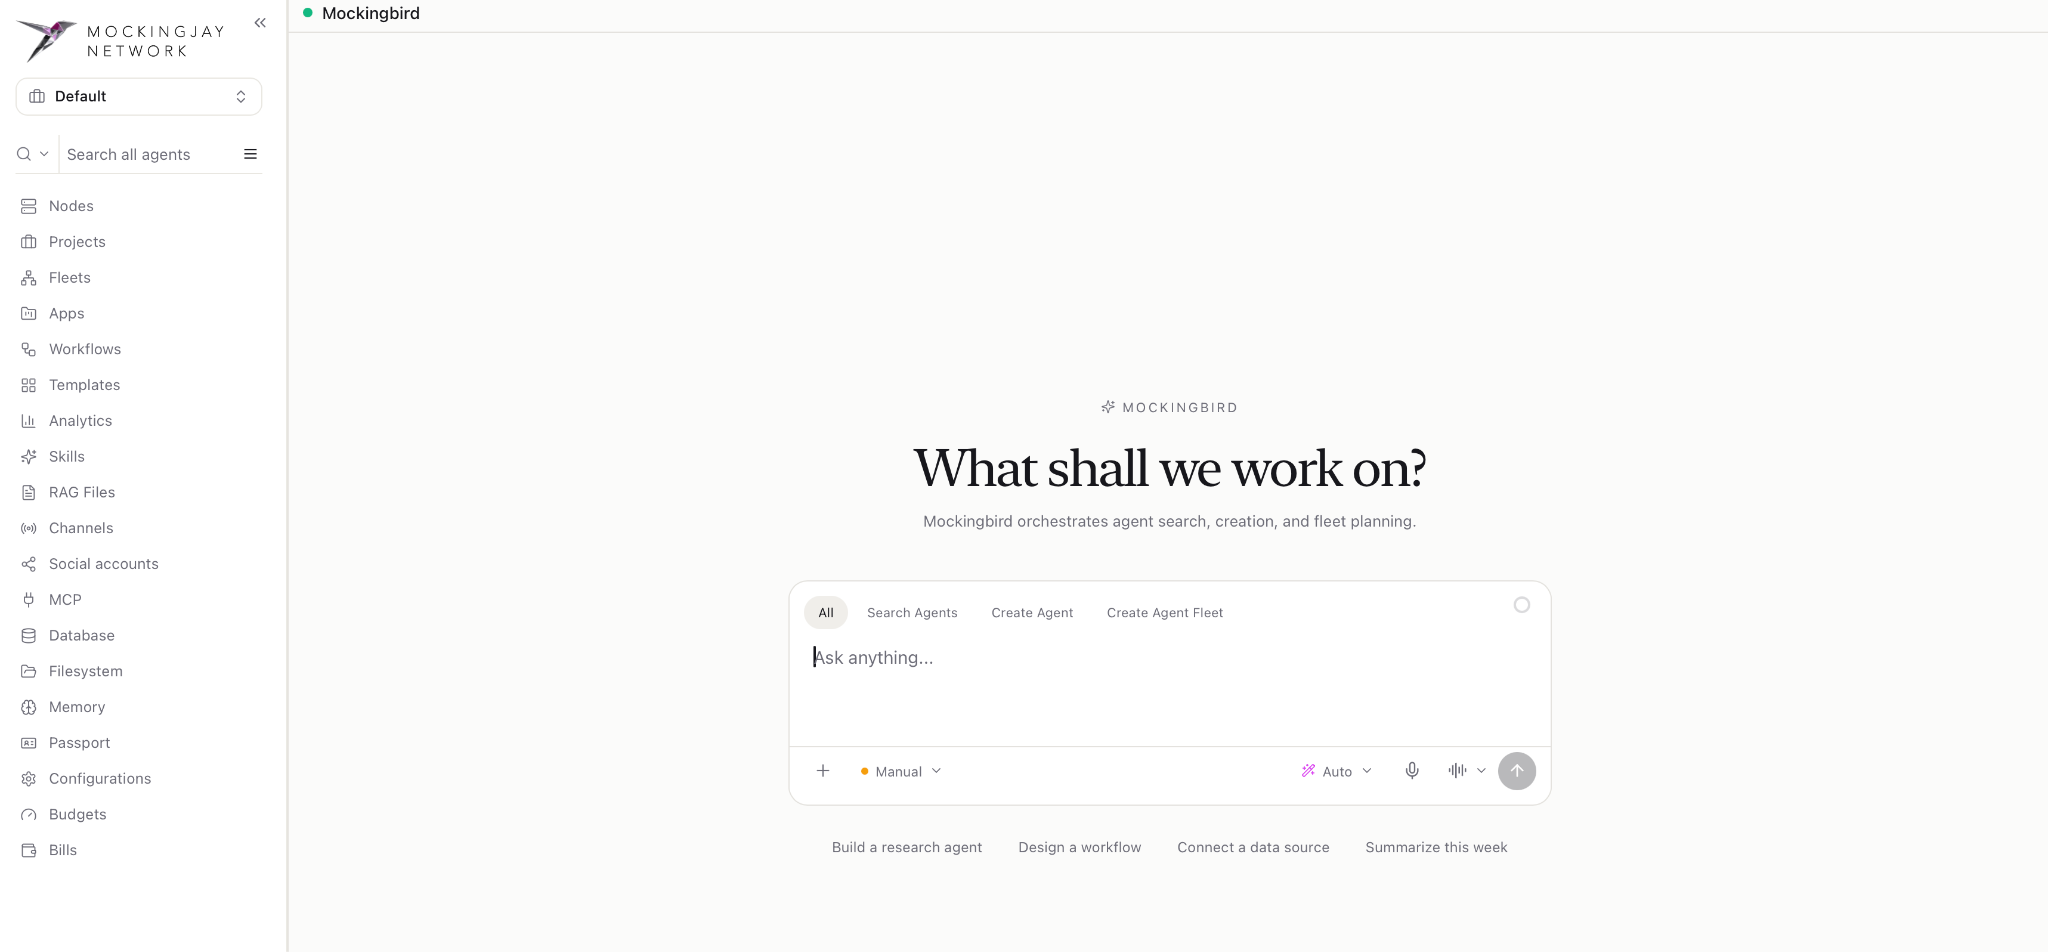
Before going further, take a moment to confirm that the application is healthy. Look at the footer at the bottom of the window: next to This device there should be a green dot, which tells you that your computer is connected as a node. Then look at the header at the top of the main area: Mockingbird should also show a green dot, which means the orchestrator is ready to take your requests. The First Launch and Verification chapter explains these checks in more detail and tells you what to do if either dot is not green.

Step 3: Ask Mockingbird to create your first agent
The Welcome Screen is a conversation with Mockingbird, and the large box in the centre, labelled Ask anything…, is where you type your requests. Above that box is a row of tabs that tell Mockingbird what kind of task you have in mind. Click the Create Agent tab, because you are about to describe a new agent.
While you are learning, it is a good idea to approve each action Mockingbird takes. Open the Autopilot dropdown below the input box and choose Manual. In this mode, Mockingbird asks for your approval before it uses any tool, so you can see exactly what it is doing.
Now describe the agent you want. The more specific you are, the better the result will be. A good description says what should trigger the agent, what it should do, where the result should go, and when it should hand the work back to a person. For example, you could paste the following request into the composer:
Create an agent called "Support Triage". When a new email arrives in the support inbox, categorise it, set a priority, and draft a reply. Create a ticket in the Helpdesk app. Escalate any refund request over $500 to a human.
Click the ↑ Send button. Mockingbird reads your request and replies with a proposal describing the agent it intends to build. It may also ask you a few questions to fill in details you did not mention. Answer them, ask for any changes you would like, and confirm when you are happy with the plan.
Step 4: Find and finish your agent
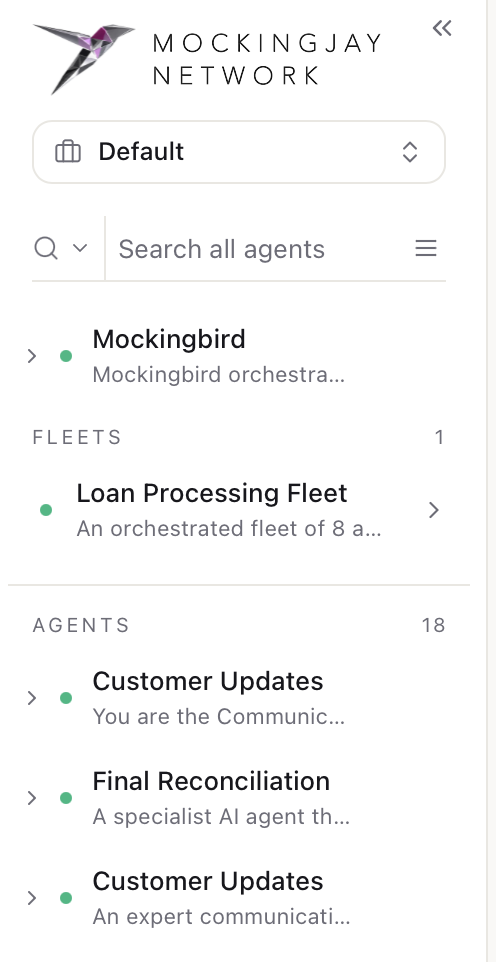
On the left-side bar click on ☰ to see the list of agents. The coloured dot beside its name shows its status: green means it is ready, while orange usually means it still needs to be connected to something before it can work. Click the agent’s name to open it.
Other ways to get started
You do not have to describe every agent from scratch. Mockingjay includes a library of ready-made agent templates for common jobs such as managing email or analysing data. Open the menu with ☰, click Templates, and click Use template on any template to create an agent based on it. In the same way, the Apps library lets you add complete business systems, such as a CRM or an accounting package, that your agents can work in.
When you are comfortable with single agents, try the Create Agent Fleet tab on the Welcome Screen. It lets you describe an entire business process and have Mockingbird design a team of agents to run it.
Guide version 2.1.73 · October 2026. Still stuck? Write to service@soika.ai or use the contact form.